|
 |
Now, let’s look at 3 different course options you have available to you, with my honest yet
non-biased opinion. I have tried to do some of the research for you, so you can make a
more informed decision on what training path to take. |
| |
 |
- Airbrushing/ Custom Paint
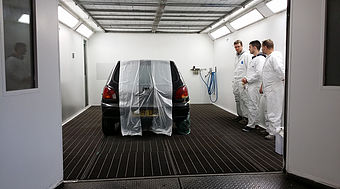
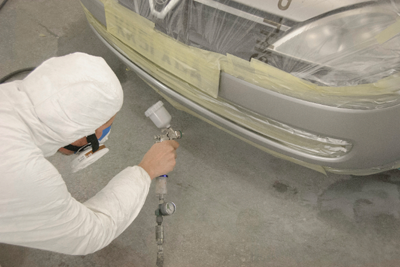
- Smart Repairs (small to medium area repair techniques)
- College and Accredited Courses |
| |
 |
Smart Repairs (small to medium area repair techniques) |
|
| |
|
|
I really can’t see any logic at all in paying £1000+ for a 5 day smart repair course to learn how to fix, bumper scuffs, mirrors, scratches and stone chips. Why limit yourself to only learning small area type, basic repairs and painting? Not to mention being trained on and forking out for ‘specialised smart repair tools and consumables’.
My 5 day car painting course is much more advanced and will not only teach you all of the above but will advance you on to more complex and larger area painting and repairs, saving you a fortune along the way.
I know I said non-biased, but I can’t help it here. I’m completely against smart repair franchises, in every way. £13000-£35000 to buy into one is nothing short of criminal, in my opinion. If you’re considering this, take your head out of those glossy brochures and do some research. If you can afford that kind of cash, come and take my 11 day course instead. After leaving me with a big tip, go and set up a state of the art body shop and your odds of success rate will go right up.
Over the years, regular smart repair work has gotten less and less. The market is flooded and just like a cracked windscreen (which used to be done by a smart repair guy), the big auto and insurance companies are now taking over all of this in lots of areas. So, be careful how you invest your money.
|
|
|
|
| |
| |
| |
|
College and Accredited Courses |
|
| |
College courses:
Most of us understand how these courses work; an officially stamped certificate from a governing body is awarded at the end. I have experience working with Darlington College in their body shop department; therefore I received a good insight into how things are run. In fairness, I really can’t be compared to this kind of course. Although our core methods are very similar, I only teach you the theory you need to know to get you through the job, from start to finish. If you want to learn the chemical structure of paint, then I’m sure this is something you can research yourself. College courses are great for kids, who want to go down the car body shop route, and have the time for it but not for those who don’t have years to learn how to paint.
Accredited courses:
Again the methods and delivery will be similar. In truth I don’t have a great deal of experience with this type of course and they are aimed at the car body shop industry. I would assume they are well-run and organised, and could possibly equip you with standardised official knowledge, as well as the working practices of a modern car body shop. If that is your goal, then I would recommend this type of course to you, however if time, standards and versatility are your goal then I can offer a better solution |
| |
| |
| |
|
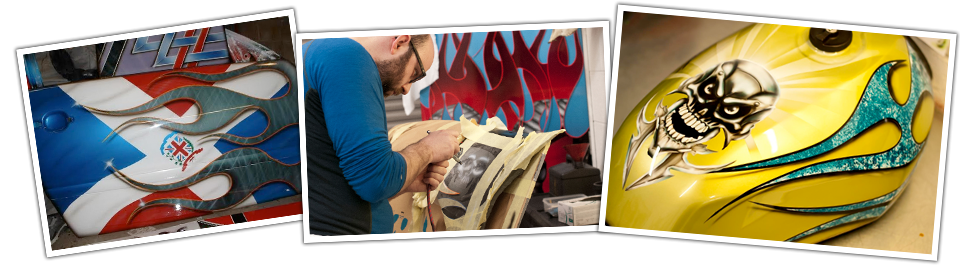
Airbrushing/Custom Paint |
|
| |
| (1 day intro to Airbrushing) (3 days all techniques) (5 day all inclusive) |
| |
| “If you were going to go on a cake baking course, where would the logic be in skipping everything and going straight to the decoration stage?” |
| |
 |
| Before I start, I would like to clear up some very misleading myths surrounding this type of course. These are the main misconceptions gathered by my own research and my students’ feedback and experiences. |
| |
| For the beginners: |
| |
| “Will I be able to paint a car or bike, if I learn to airbrush?” |
| |
If you go on this type of course, you WILL NOT be able to paint a car or bike, or, any other surface for that matter, if you’re going through the full process of a custom paint job. Airbrushing is for artwork only, therefore a much broader knowledge is needed to tackle a full custom paint job.
If we take that airbrushed skull on the top of that Harley tank as an example, what else do we need to know to start and complete this job?
a. Does it have decals to remove?
b. Will it leave a Lacquer edge to be feathered?
c. If I sand through to metal, do I have to etch first before primer?
d. 1k or 2k primer and how will it affect shrinkage issues?
e. What colour?
f. How long should I leave it before sanding and how should I sand it?
g. Should I use a sealer for this area?
h. I'm spraying a light silver base for my airbrushed skull, should I flatten the tank dry, wet or maybe just use a scotch-brite pad?
i. What grit should I use so I don't get sinkage scratches?
j. What gun should I use? A mini or full size, 1.1, 1.2 or 3?
k. What if my silver goes on too dry (or too wet for that matter)?
l. Is my gun set up right?
m. I'm getting orange peel, am I too close and wet, or is my pressure too low? Maybe my paint consistency is too thick?
n. Water or Solvent based paint?
o. Shit! I have a reaction, how do I fix it? How did it happen? |
| |
| |
|
|
| “Phew! Everything went well, and now we can relax for a few hours and airbrush our skull.” |
| |
OK, to finish the job off let’s lacquer the tank.
a. Should we use high solids, or medium, and how many coats?
b. Do we need to sand it down the next day for a second lacquer stage?
c. Shit! I got a drip right on an edge, is there anything I can do while it’s still wet?
d. I’ve sanded through to my paint trying to remove the drip, what do I do?
e. I used an airbrush to touch up my mistake, but it’s gone darker in that area and I can still see a halo in the area I sanded through. Why?
Just a small insight into the process! I could go on and on, but I hope you can see where I’m coming from now. |
| |
| If the claims are that you can paint cars and bikes, they are completely false. |
| |
| “The instructor’s work is outstanding; he must be the best teacher!” |
| |
When I’m teaching airbrushing, I purposely keep clear of all the glitz and glamour, and stick to teaching you core airbrushing techniques, which relate to all airbrushing jobs. I don’t just focus you in on one specific image.
This may not be the best move for me to sell the courses, but I’m in the business of training you to handle an airbrush in a small space of time, not just to show you how to do a pretty picture.
My airbrush exercises, which you can see in the student galleries, are not easy for a beginner to achieve. In fact, Day One is what I call the ‘shit-fuck-bollocks day’, as its frustrating for everyone, and that’s all I hear all day!
The glitz and the glamour come later on, as you can plainly see in the student gallery.
But surely it’s the students’ work you should be looking at, right? Nothing hidden, it’s all on display for you to see the standard a beginner can achieve. I don’t just have the odd student holding a really professional piece of art, and claiming it’s off the back of a one day beginner’s course. You see all my students’ stuff in my galleries. At no point during my research could I see pictures of a class’ average standard of airbrushing. All I saw on my research tour was endless pictures of the teachers’ work, the back of students’ heads in large groups, and images of state-of-the-art studios, spray booths and equipment. Not to mention some seriously over-inflated egos. |
|
All of that goes against my style. I really don’t need to waste your time and mine sitting there giving you endless demonstrations on how to achieve certain effects like how to airbrush wood, a chequer plate, rock, metal etc. Once you know how to airbrush these, individual looks can be easily learnt yourself, from your own assessment or from the many people giving demos on the net.
I class myself as a non-artistic air-brusher; this means I can airbrush an image in front of me to a very high standard and sell it. If it’s art advice you need, I have that covered; Jennifer, my office manager and teaching assistant, is a qualified art teacher and is there to assist in any art related issues you may have. Some courses are run by outstanding airbrush artists and I have read statements saying, ‘’look at your teacher’s work to see what standard you will be taught to’’. This statement only compares their work to other teachers’ work and it has nothing at all to do with the students’ capabilities. These guys are ‘artists’, with natural ability to produce their standard of art, but they are the first to remind you that you don’t have to be an artist in order to airbrush. This is true, to a certain degree. You don’t, and I’m a prime example of that.
So if that’s the case, surely it’s all about techniques, right? Yes it is, and then natural artistic ability takes over to produce some of the teachers’ work you see on these other course sites. So really the question is, who has the ability to get you to the best level you can be in the time you have? Again, have a look at my students’ work and you’ll see for yourself.
|
| |
| “Is it about learning to airbrush or being taught on specific products and equipment?” |
| |
I could tell you anything on my course and you would believe it, what else do you have to go by? I’m personally free of this misconception and always will be. So, if it seems a course is geared towards specific products, then maybe you won’t get to see the bigger picture. Again my focus is on training and not building an ongoing customer base.
|
| |
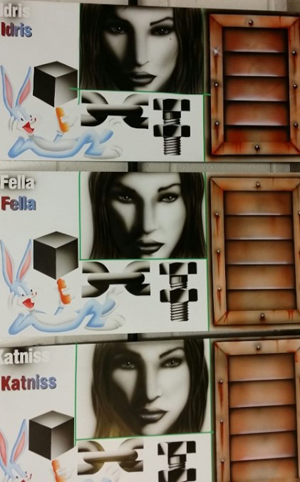
I teach both stencil and free hand airbrushing in my 3 day course, as well as lots of airbrushing on paper that you won’t see in the pictures. The standard of airbrushing can be seen here, in this photo. This is a techniques board that we work on, and once you have completed this it’s just a question of joining the different techniques together to achieve many other airbrush designs.
However, this does not teach you custom painting, in the form of flame jobs and larger designs, where block colours and pinstripes are used; the two are very different. Here the airbrush is used to emphasize your job and shading only, as the bulk of the work is done with masking and paint guns. This in itself opens up the realms of conventional painting and that, in itself, is a whole different subject altogether.
My 5 day custom course will take you through the custom paint process, so it includes a crash course on how to paint, lacquer and sand. It can be as intense as you want it to be, depending on what you want to get from it. During this you’re taught on a flat surface, but you still go through the same process as the guys on the 11 day course.
Obviously it’s hard for me to not sound a little biased; I’m just giving you a base to research for yourself. I’m not taking away from my competitors here as I’m sure they are all well-run courses in their own manner (and people enjoy them) but the proof is in the pudding. |
|
 |
|
| |
|
| |
| |
| “Now ask yourself, are my courses value for money? Have a closer look at what they cover in terms of, the level of commitment and the cost we put in to you. If you can find a course that offers you more, let me know, I will gladly give you training for free!” |
 |
| |
| |
|
|
|